Sunday 27 November 2011

Vegetables in baking

Vegetables are undergoing a bit of a fashion revival at the moment I feel, teaching 5 year olds I was amazed when we did our topic on healthy eating and they came up with a whole multitude of veg that they enjoy. Exposure to more unusual veg through farmers markets and organic box schemes like Riverford and Abel and Cole have helped this somewhat. Even my personal food hero Hugh Fearnley-Whittingstall is championing the eating of more vegetables in our meals. 
In fact watching River Cottage Veg Everyday has got me to thinking about how I can use more veg in my baking. I tend to bake only sweet things so it is really is an area of alchemy ripe to explore. 

I'm tempted to try this recipe avocado chocolate tart, it seems really easy and looks delicious. I can totally see how avocado would make a smooth and creamy chocolate ganache. No cooking involved either and no dairy or gluten too! Apart from the walnuts in the base it's quite a good dish for intolerances. I may suggest making it instead of the chocolate truffle torte I usually make at Christmas.

I have a feeling my upcoming allotment will feature heavily in an increase of eating vegetables in my diet after xmas. I can feel a second blog coming on too perhaps...

Recipe

Courgette cake
recipe from hummingbird bakery cake days

This couldn't be simpler, in fact there's not even any butter in it so there's no fussy creaming to do. 

In the bowl of an electric mixer, with the paddle attachment (or in a bowl with an electric hand whisk)  mix together 3 large eggs, 300ml of sunflower oil, 1/2 tsp of vanilla essence and 300g of soft brown sugar. Beat until well combined. In another bowl, sift together 300g of plain (allpurpose) flour, 1tsp bicarb, 1tsp baking powder, 2tsp ground cinnamon, 1/2 tsp ground ginger, 1/2 tsp of ground nutmeg. Add this to the oil and egg mix slowly and in two batches. Then when it's all mixed in, add 300g of courgettes peeld and grated and 100g walnuts chopped. 
Divide the mix evenly between three 7inch sandwich tins that have been lined with baking parchment. Bake in an oven at 180C for 30 -35 minutes or until the cakes have slightly come away from the sides of the tin and when you touch it lightly it springs back. 
Remove from the oven and allow to cool in the tines slightly (this makes the cakes easier to remove) then cool completely on a wire wrack.

Assemble your cake using a good cream cheese frosting, putting a couple of table spoons between each layer 


Then frost the sides and the top, smoothing out with a palette knife. 


A dusting of cinnamon at the end is optional, as was the purple edible glitter that my flatmate added afterwards. This was for a birthday cake for my flatmate's mum and it went down a real treat, considering that the idea wasn't one that was intially taken wholeheartedly. 

I do recommend you try it out!

What vegetables have you used in sweet baking and how did you use them?

That's all from me for today, a shorter post I know but next time will be more xmas baking!

Wednesday 16 November 2011

Christmas is a coming!

Well I can, honestly and thankfully say my journey with the GBBO is over. I had a phone call yesterday with "not good news" and they gave some scripted feedback of " the quality of candidates was very high, yadda yadda yadda, range of repertoire blah blah blah" to be honest I wasn't listening, I was just letting it sink in a bit. Not only did I get so far last time, to being a standby, they then badgered me to apply this time, raising in me that false sense of hope. At least I know I'll have some sort of normal life for the remainder of this academic year, and I'm a true believer in things happening for a reason. It wasn't meant to be and in the spirit of my good, and very supportive friends, onwards and upwards.

The best things to come out of all of this are my blog and my expanded repertoire of baking. I'm not scared of trying something new, knowing that actually nothing is impossible if you truly believe it! Also I'm not going to forget the praise Mary Berry and Paul Hollywood had for my baking when I met them earlier this year; great pastry and wonderful meringues!

Recipes
Two recipes today, which I made as a stuff you to the GBBO last night in a bid to move onwards and upwards. I can't claim they are my own creations, but they are very tasty and well worth sharing with you.

Jamies mince pie cookies


250g unsalted butter at room temperature and soft
140g caster sugar
1 large egg yolk
300g of plain flour
1 jar of mincemeat (411g)

Making these made me realise that a cookie recipe is basically a cake recipe minus the raising agent and so much egg. Cream the butter until it's light a fluffy with the caster sugar, it really does take about 3-4 minutes in the Kenwood electric mixer, and the change is quite amazing. I always used to cream butter until I was bored (back in the days of using a wooden spoon) but now I have the Kenwood, I know it is much more. The butter does get paler, and the volume increases until it's like stiff cream!
Mix in the egg yolk and sift in the flour. This should make a thick paste which you can fold in about 3/4 of the the mincemeat. Take a tea spoon (the regular kind not the measuring kind) of the cookie dough and plop it on to a lined baking sheet. Add a smidgen o the reserved mincemeat onto the top of each cookie ball before baking in an oven that has been preheated to 180C for about 10 minutes or until golden brown. Dust with caster sugar and let cool on in the tin for about 5 minutes before transferring to a wire wrack.

These would be amazing sandwiched with a boozy, brandy buttercream!


They went down a treat at rehearsals and the mincemeat flavour really came through!

Nigella's Almond Macaroons

If you like coconut macaroons and marzipan then these are the treat for you, and amazingly easy to make. The recipe is one that I have already committed to memory too it's so simple!

200g ground almonds
200g caster sugar
2 large egg whites.

Basically mix all of the above into a dough and when it comes together break off bits about the size of a walnut and roll them into a ball. Put them onto a lined baking sheet and stud the top of them with a blanched whole almond. Press them down slightly and bake them at 180C for 10 minutes until they just start to take colour.


They were slightly chewy and very delicious! I can see pistachio, hazelnut and other ground nut varieties of this recipe! 


Mary Berry's Christmas Cake


Yes, I know, can you believe it? This year has seen a surge in supermarkets doing their own version of a Christmas Cake kit. Tesco have Mary Berry, Waitrose have Delia Smith and Sainsbury's have their taste the difference version. I think it's great to get people to challenge themselves with their baking, Chrimbo cakes are quite a commitment to get right! 

I wish I had the time to try them all out and review them (I'm not sure I could stomach that much fruit cake though!). I'll stick with the family recipe for the time being.


Sunday 13 November 2011

Cinnamon Buns!

I have applied to the third series of the British Bake Off but having signed a form to say I can't discuss it I won't be mentioning it on here, however I will say this, I'm going to do my damnedest to get on to it this time (after last time being so close!).

In other baking news, I've practised my hot water crust pastry, which I can only compare to a warm clay when it comes to working with it. I followed Paul Hollywood's recipe for it from here and used beef dripping instead of lard (which is apparently a pork fat I thought it was generic animal fat). I tried to roll out the pastry but it proved too tricky to manage; it decided to stick to the work top and refuse to be peeled off so I had to research other techniques to make the pie crust, and this is where my analogy to clay comes from.
Delia recommends taking two thirds of the dough for the pie crusts and reserving the remaining third for the lids, then to use your fingers to shape the crusts. This method worked really well.

I took the 2/3, divided them into 6 equal balls (I didn't weigh them to ensure absolute equality, that is going a bit overboard I reckon), and popped each ball into a muffin pan hole.

My usual muffin pan was set to one side in favour of this funky new contraption I found in Lakeland here. I heartily recommend it for dishes such as this, the greatness of it is that it has straight sides and loose bottoms! This made it from perfect pork pies, or in my case layered vegetable pies.

Using my fingers I pulled and shaped the dough to fit the tin, pushing it into the corners to give a crisp 90 degrees. I made sure to pull the dough up over the top of the case to help form a decorative seal when the lids were put on. My fillings were various layers of roasted vegetables, that I had cooked before hand so they had shrunk already, and then I took 1/6 of the reserved dough and flattened it between the palm of my hands to make a disc for the lids; sealed it up and brushed with egg wash. I used a knife to make a hole in top which would let the steam out and also allow me to pour in a jelly made with vegetable stock.
These photo's show you how they turned out! The layers were, courgette, aubergine, roasted red pepper, onions, mushrooms and a sun dried tomato at the top. They were fantastic and I recommend you have a go at making them.

The one below is an example of where it didn't work, the vegetables were raw when I put them in and as they cooked they shrank. This left a massive hole at the top of the pies filled with nothing. Cooking the veg before hand helped solve this.


Alchemy
This weeks alchemy is based on that traditional recipe of a cinnamon bun. Instead of a the plain cinnamon and muscavado sugar filling, I decided to up the ante and change it to sour cherries, pecans, cocoa powder, cinnamon, ginger and muscavado sugar. This produced a rich, gooey, treacly filling which went down a storm. That was lucky too as I didn't actually try it before I unleashed it upon the unsuspecting!
Glazed with an apricot jam glaze, they were very very delicious.

Recipe: 

For the dough
275ml of luke warm water
5g of dry active yeast (not that instant yeast you get in sachets, this is the yeast you may find in a little tin).
4 tbsp of granulated sugar
600g strong bread flour (white works best, wholemeal is nice, but the buns are very heavy)
1/4 tsp salt 
175ml warm milk
75g of room temp, soft butter

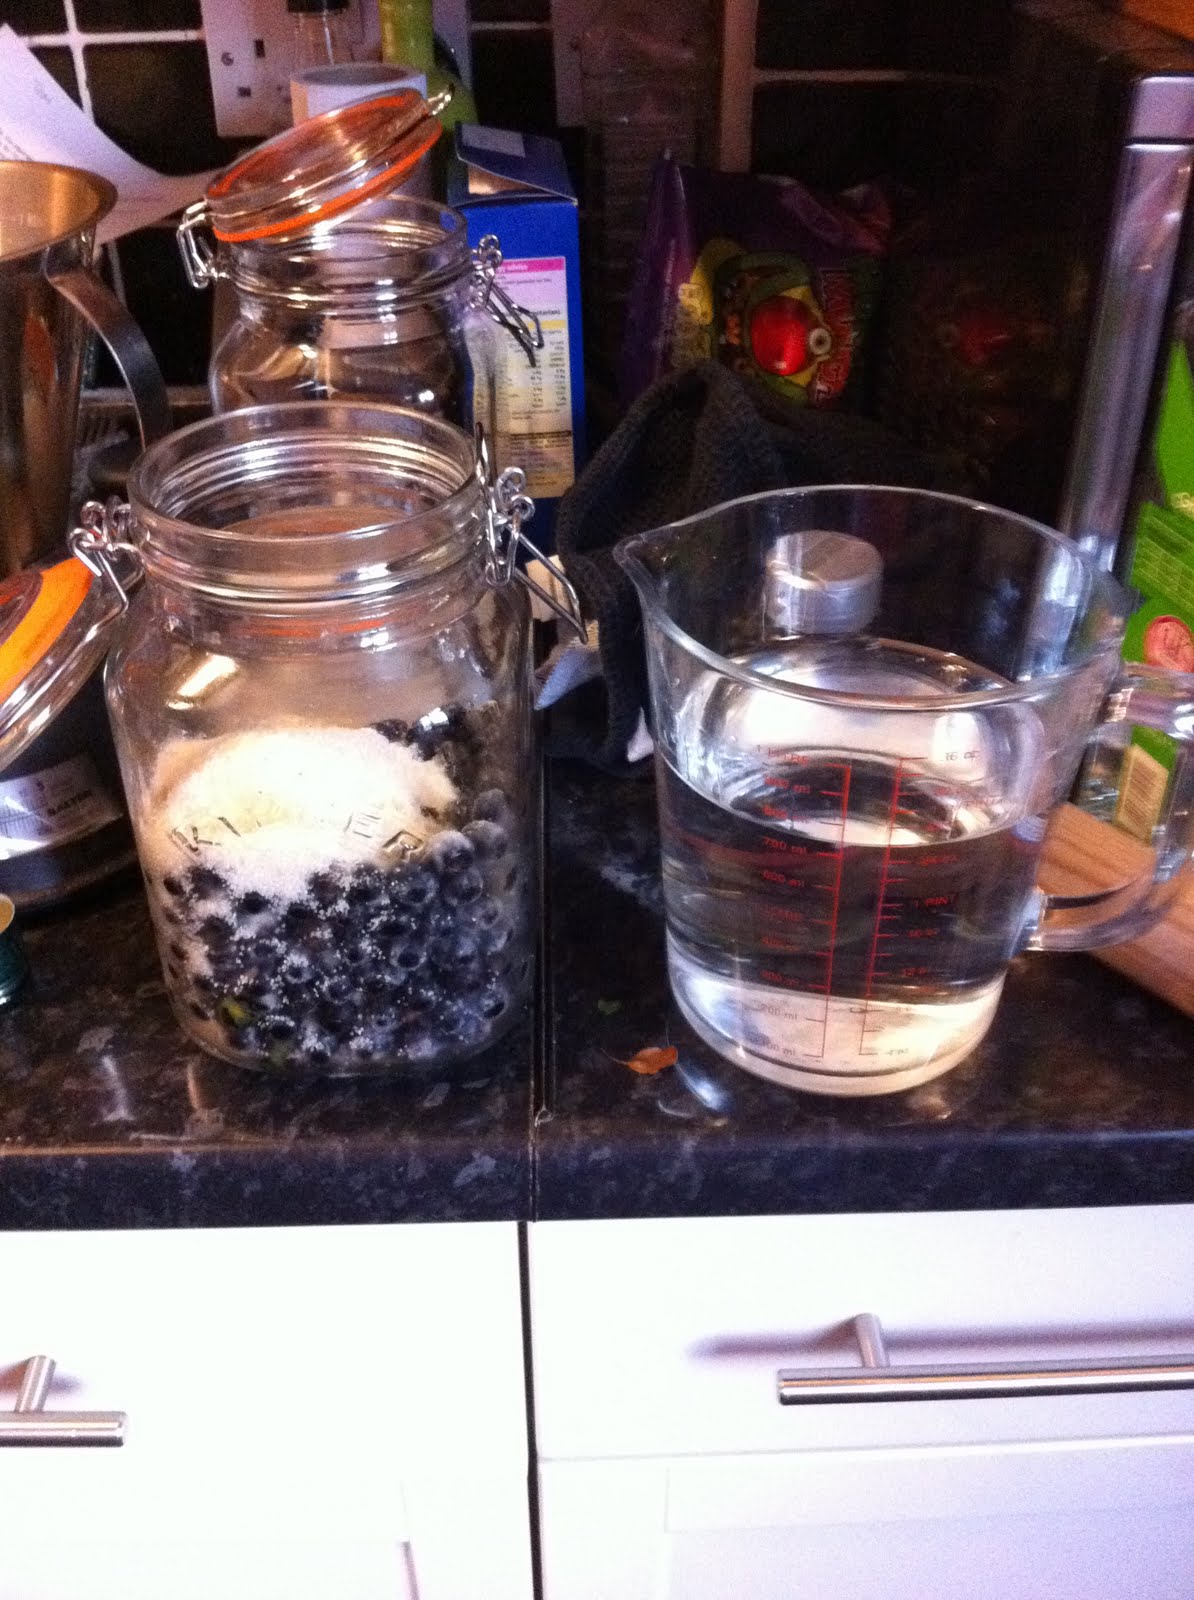
To make this dough weigh the water and the yeast in a jug (1ml of water weighs 1g which is handy!), hitting the zero button between each addition. Put one of the 4 tbsp of sugar in to the lukewarm water (stir to dissolve it), along with the yeast and set it to one side to allow the yeast to activate and start frothing away. In a large bowl, stir the flour, remaining 3 tbsp of sugar, salt and also the butter (which should quickly rub in due to its soft nature).

When the yeast has frothed up and proven it's alive, pour this into the flour mix. using your fingers mix it all up and add enough of the milk to just make sure you get all the rest of the dry ingredients. You may not need all of the milk.

Turn the dough out on to a floured work top and start kneading. Knead for about 10 minutes by pushing away from you with the heel of your hand and pulling it back towards you with you fingers. What you are doing when kneading is activating the gluten. Gluten is a lovely molecule, key to baking. In bread you want it to form long elastic strands which give an airy texture to trap the CO2 made by the yeast as it feasts on the sugar; this is the opposite of pastry where you want to minimise the gluten activation!

The way I tell if the dough is ready is by gathering the dough into a ball using the outer edges of my hands turned inwards. I scoop and turn from the bottom of the dough which pulls the top down taught like a drum skin. Then I press the top with my finger and if it springs back quickly you know it's about ready. 

After this, place the dough ball into a lightly oiled bowl and turn it so as to cover all the dough with a light sheen of oil (flavourless oil for this sweet dish). Leave it somewhere to double in size, the temperature will affect the speed this happens at. 

Preheat the oven to 200C and line a deep baking dish with paper. Take your risen dough and knock it back by punching it! Then stretch your dough out with your hands into a large rectangle (I'm not sure how big really, but maybe 30cm long and 20 cm wide). Then melt some butter and brush on to the dough (this helps the sugar mix adhere). 

in another bowl mix up sugar, sour cherries, pecans, cinnamon, ginger, cocoa and a little salt to taste. Sprinkle this over the buttered dough and then roll it up and if you run out make up some more. Roll up from the longest edge closest to you, keeping it tight and trimming off the edges if they flay all over the place. Once rolled tightly, cut it into about 12 thick slices and place them close together int the tin. Use the off cuts to fill in gaps if needed; they also work well as tester balls to see if the buns are cooked.

Bake until cooked and brown then take out of the oven and serve asap.


Tuesday 1 November 2011

A long overdue update

Hello dear readers, I'm back now that my laptop is fixed and I have a whole host of updates to share with you. I've kept up with my baking, especially since the Great British Bake Off series 2 has finished and I'm trying for the 3rd series now. I have decided that I need to practise making puff pastry, choux buns and croissant dough.

Baking
My most recent bakes include two dishes that I took to a halloween party at the weekend. I made a Red Velvet Cheesecake from the Outside Tart baking book,
Sadly the middle wasn't cooked as much as the edges and this was due to it being too full when I put it into the oven. The recipe made SO much filling for a 9inch pan (the recommended pan size). It tasted amazing though and to be honest, for a halloween party it was great; I called it a blood cheesecake.
I also made come carrot cake whoopie pies, from Outsider Tart, but I didn't put frosting on them and served them as carrot cake cookies really.

Recipe
When I was in London town recently I went to Mitsukoshi, which is a Japanese department store. In its basement is a Japanese book shop and I decided to buy a Japanese baking book. he great thing about Japanese cook books is that they use photo's for step by step instructions. Using my rudimentary Japanese reading skills I was able to pretty much get the recipe for a basic vanilla pound cake.
Here's the book, 

The first set of photos showed me how to perfectly line a baking tin.

First take some greaseproof that wraps up both sides and along the base.

Fold it up the sides and crease.

Fold it up the ends and crease too.

You should have basically a grid like this and then you can cut it as shown below.


Fold the sides up and the end so there are three flaps overlapping at the ends. Then slot it into the tin and bingo you have a perfectly lined loaf tin!


Pound Cake
100g butter
100g sugar
2 eggs
100g plain flour
1/2tsp baking powder

One thing that I added, for flavour was some vanilla extract too. The interesting thing about the recipe was the meticulous detail that the writer went to with every step. Even showing how they smooshed the egg through a fine sieve to remove the lumps.

It does make for a smoother egg which mixes easier into the batter. 

Method.
Sieve the flour and baking powder onto a piece of greaseproof paper. Whisk the butter until smooth and pale, about 2 minutes with an electric hand whisk. Then add the sugar and beat for a further 2 minutes. Scrape down the sides with a rubber spatula to ensure it all is incorporated. Next add the egg 1tbsp at a time, use a balloon whisk to mix it 20 times after each tbsp of egg.  Mix in the flour and baking powder using a wooden spoon, being careful to mix all of the flour in thoroughly, though not over mixing (the book recommends 30 stirs). 

Spoon the mixture into the prepared tin and bash it against the work top to level the mixture out.  Pop it into the oven which is set at 180C. After just 10 minutes open the oven door and using a very sharp nice cut along the length of the cake then put it back into the oven to continue cooking for a further 20 minutes or until a tooth pick inserted into the middle comes out clean. What the cutting does is allow the cake to rise up through the middle, giving it that traditional pound cake look.

 Now I'm not a fan of basic sponge cake, but this was a great recipe and made a delicious vanilla pound cake!

Alchemaic Baking
This book goes on to suggest different things to do with the cake. Being Japanese it suggests mixing green tea powder into it, anko bean paste and cocoa powder. There are some other interesting combinations too though, like slicing a pear on to the top of it, making a marble cake with half of the batter being one flavour and the other half being vanilla. 
Once you have a basic batter, you can really add anything to it! hmm ginger might be nice, with a gingery glaze on top too....

Sunday 11 September 2011

Baking books

I dreamt last night that I baked 20 different things in 2 hours, I don't remember what it was but I do remember being very stressed by the whole ordeal. Perhaps not being in the Bake-off is for the best this year.

Herman
Herman is now dead, I baked him into a cake and split him up to give some away. The only issue with Herman is that not many people are too keen on the idea of having a living, seething, growing bowl of cake in their kitchen so the bowls sat on the staff room table for a few days. It was a fun experiment but I shan't be repeating it anytime soon. The cakes weren't particularly sour either, maybe I'll have more luck with bread if I try that again.
I have got photo's of Herman being baked, but for some reason, they aren't coming up in my iphoto folder even though I did import them so this will be a photo free post. I'm sorry, I know that photo's really help with a baking blog.

Anyway, I have had some exciting baking developments recently. I visited Outsider Tart in Chiswick, having bought the book written by the owners. I took a friend along to sample their treats and was not disappointed. Having gone to Cox Cookies and Cakes anything would be better really.
The owner was working that day and my friend and I sat at the bar inside, despite it being a sunny day, I wanted to chat baking with him and it was a great conversation. I ate a snickers brownie and she had a pecan cheesecake, and we talked about the best way to make brownies fudgey and to get uniform sized whoopie pies; take the brownies out of the oven early and use an ice cream scoop for the pies. Also sat at the bar was a radio DJ who had just interviewed Ed From last years Bake-off, which was a very cool coincidence and I was able to talk about the show and my experiences too, overall it was a great visit and I heartily recommend you go and visit.

When I got home I made the Hepburn brownies form the book along with banana whoopie pies (which I filled with a slightly cinnamon cream cheese frosting).  They were very delicious and the brownies turned out very well, I took Dave's advice and took them out of the oven before they overcooked and set them over night in the pan in the fridge. The next day they came into work with me and were demolished by my co-workers and they were amazingly fudgey!

Baking books I own and recommend


Baked Explorations: Classic American Deserts revisited.


This book has some extremely tantalising dishes in it, I've yet to try them but when I look through it I get lots of inspiration. It's well written and the recipes are mouth watering.

Baked: New Frontiers in Baking


By the same authors as the other Baked book, again I've not explicitly used the recipes contained in it, but they do inspire me. Much the same as the other book.

The Whoopie Pie Book


This book started my journey into baking whoopie pies and the basic chocolate pie along with the marshmallow filling were the recipes I chose. Whenever I've picked this book up I've been inspired. It's truly great and all the recipes work.

My thoughts on whoopie pies are that basically any cake can be made in to them, just use an ice cream scoop to portion the batter onto a baking sheet (it helps them stay uniform in size). I have a grand idea of  developing a shop where you can choose which flavour pie halves you want to put together with a choice of filling, a make-your-own pie shop... One day I'll get there. Perhaps I'll bake a huge batch of multiple flavours and then open a market stall in Bromley.

Bourke Street Bakery


Everybody needs to own this book. Extremely comprehensive recipes and techniques, this book taught me the secret of good pastry and meringues both of which got me through to the final audition stage of the Bake-off. I just wish the bakery it was written out of was in London not Australia, but then again that's an excuse for a visit.

Kitchen


Nigella's cookbooks are always a good buy. Her recipes really work and my favourite from this book is her chocolate chip cookie recipe. I've yet to find one to best it and they come out looking exactly as they do in the pictures. I've even mixed up the flavour combo's in them and they still work well. The book has recipes other than baking ones and these other dishes turn out just as well.

Hopefully next time the photo's I wanted to upload this time will work.

Friday 2 September 2011

My friend Herman, Gin, Cox Cookies and Cakes.

Herman
At the start of the year I dabbled in culturing wild yeast when I looked at making sourdough bread. The result was quite a success and something that I recommend everyone to have a go at as it was ridiculously easy to do! The bread I made with the sponge was, well, sour and it was quite a solid loaf but a success nonetheless.
Here's a picture of the culture bubbling away.


Upon arriving back into London this week a friend called to say they had a mysterious present for me that they needed to deliver sooner rather than later. We hastily arranged a drop off time and that evening I was presented with Herman. Herman came to me in a little plastic bowl, looking a little cold and in need of a feed, I had just been presented with my first sourdough cake starter.

It's the same concept as a sourdough bread starter but instead of feeding and discarding, as you would with the bread, Herman keeps growing with each feed, until you divide him up, give some away and then bake the sorry remains into a cake. There's even a book full of Herman related recipes, The Best of the Herman Sourdough Herald and apparently my mum was given Herman by a friend of the family way back in the 80's so the concept isn't new. I was very excited by it though; alchemaic baking in its most primal form.

Here's a photo of Herman as he stands in the kitchen, fed and happy and bubbling away,

Check back in 4 more days to see if he managed to survive and make it to being a fully fledged cake!

Sloe Gin
Not strictly baking I know, but when my Dad told me the sloe berries were ripe early this year I jumped at the chance to gather a few. Growing up in the Forest of Dean I learned where the best blackthorn bushes were and so I set off to gather. I managed to pick about 2lb in the end, leaving plenty for the birds to feast on as the weather gets cooler. 
Traditionally you are meant to pick them after the first frost, as this allows them to develop a fuller flavour, but by that time they are usually all gone so I cheated and put them into the freezer.

Once frozen I washed them (resulting in a frozen lump of sloe ice, I recommend washing and drying before freezing) and weighed out 1lb. 

I poured these into a 1litre Kilner jar and then using a rolling pin I 'muddled' them. 
Muddling is a word which best describes the act of mashing up fruit or herbs when making cocktails.

I added 150g of sugar to them, and then 5 cloves and half a stick of cinnamon.


Then came the gin, 750ml of it. 


I poured it over the top and then added 1/4 teaspoon of almond extract. The jar was sealed and shaken with gusto at the thought of the resultant liquor. I wrapped it in newspaper and put it in a cupboard. 


Now all I need to do is give it a shake every now and then and in three months it should be delicious Sloe Gin.

Cox Cookies and Cake

No alchemaic baking in this post, however I bought a new brownie pan from Lakeland yesterday and also bought Baked in America which has some good recipes I want to try out in it.
I also looked at some other books and in one found a great decorating idea.
Take some bubble wrap, wash it and dry it and then pour tempered chocolate over it. Once set, peal off the bubble wrap and you have a really interesting negative of the bubble wrap, in the chocolate. Brush with edible gold dust and adorn you favourite cupcake with this and it will be quite special. I got the idea from this book, Cox Cookies and Cakes a cook book based on the cake shop by the same name down Brewer Street in Soho. So inspired by this decorating method I decided to not buy the book and pay the shop a visit to sample their cakes and see the decorations for myself. Now Cox Cookies and Cakes is a shop developed by Patrick Cox a shoe designer and Eric Lanlard an award winning patissier. With those two at the helm I thought highly of the cakes they would produce. 
I settled on a classic and bought a red velvet cake, parting with 2.75 (even though the menu said 2.50) and, with my treasure in a little box, went to Green park to eat it (and take some arty fart shots with my phone).


Looks nice huh?! In the box, on the grass, oishi so desu ne!
Still tasty looking, nestled in the grass with the deck chairs in the back ground. A little crumb of some  pallid orange coloured cake on top as decoration. It was at this point I was beginning to doubt the redness of the cake and fear for the velvety texture that the name promised.
As you can see, my fears were well founded. This cake was neither red, or velvety. In fact it was as you see, some poor excuse for a red velvet cake, the colour barely there at all. The texture was even worse, it had some massive air bubbles in it and overall the cake had a plasticky feel to it. It reminded me of a cake made with oil as opposed to butter. It was spongey but not in a victoria sandwich way, more of a Savers multi-buy plastic bath sponge way. The flavour was good, a basic vanilla sponge really but not the red velvet cake it should be that being a rich cocoa flavour.

I was very disappointed and won't be going back, and I urge you to not bother either. The shop is incredibly gimmicky and they seemingly put more style into their cakes than substance, avoid, avoid, avoid.

Similarly I popped into a previous favourite of mine, the hummingbird bakery, and the cakes on offer were also disappointing. It seems like they have become stuck in a rut and their drive to develop new and interesting cakes is on sabbatical. I hope this is a blip and they pick up soon as they do know how to make a tasty cake.

I will be looking to visit the Outsider Tart cake shop of the Baked in America book fame, and I hope to be able to report a more pleasing experience.

Wow, when did my blog become a review blog... I promise baked recipes next time!


Monday 29 August 2011

Ginger biscuits and beyond.

Growing up my favourite biscuit was a custard cream, closely followed by a gingernut. Custard creams are delectable sandwich biscuits with a 'custard' filling and the correct way to eat these is to prize them apart and scrape the 'custard' off one half, I suppose they are like an Oreo in that respect. Gingernuts are a harder biscuit and need a good dunking in coffee or tea to soften them up before you eat them or they are liable to cause damage.


There is something very satisfying about dunking a biscuit and then eating it, and it really seems to be a British thing to do. I remember introducing the art of dunking to my Japanese co-workers when I was there, and the expression of surprise/delight accompanied with a muffled "Oishii" said it all. Delia Smith has a great recipe for gingernuts in her book "Delia Smith's Complete Cookery Course", the cornerstone of any cook book collection, chocked full of tried and tested recipes which never fail. 
Here is her recipe as it is in the book.

Gingernuts
4oz (110g) self-raising flour*
1 tsp ground ginger
1 tsp bicarb of soda (baking soda)
1.5oz (40g) of granulated sugar
2oz (50g) butter
2 tbsp golden syrup

Preheat the oven to gas mark 5, 375F or 190C (175C for Fan ovens). Grease one or two large baking sheets and dust with flour.
Begin by sifting the flour, ginger and bicarb into a mixing bowl, add the sugar, then lightly rub in the butter until the mixture is crumbly. Next add the syrup and mix everything together to form a stiff paste.

Now divide the mixture into 16 pieces about the same size as each other, and roll each piece into a little ball. Place them on the baking sheet, leaving plenty of room between them because they spread out. The simply flatten each ball slightly with the back of a spoon and bake just above the centre of the oven for 10-15 (I found 12 was perfect), by which time they will have spread out and cracked rather attractively. Cool on the baking sheet for 10 minutes, then transfer to a wire wrack to finish cooling, store in an air-tight tin.

*self-raising flour has a raising agent mixed into it in the correct proportions for cake baking

Now these turned out fantastic and Delia was right in her blurb where she said that when you first make them you wonder why you ever bought them before.

Alchemaic Baking

In my bid to come up with some original takes on classic recipes I decided to ransack my parents pantry and see what spices and flavours they had in there. I pulled out, stem ginger in syrup, chinese 5 spice, black treacle and sweet mixed spices.


Substituting them into the above recipe was really easy, just take out the ginger and golden syrup and replace it with the following:

Stem gingernuts
  • 3 tbsp of the syrup from the jar
  • 2 pieces of the ginger diced very finely

5 Spicenuts


  • 1 tsp of 5 spice
  • 2 tbsp black treacle
Mixed spicenuts


  • 2 tsp of mixed spice
  • 2 tbsp of golden syrup

The results were really great, I think the stem gingernuts were on par with some of the finer range of biscuits you can get in shops. The mixed spice ones were still not flavoursome enough and could have done with some more spice in them, another tsp perhaps. The 5 spice and treacle ones were very interesting, Mum described them as tasting like a glass of Pernod, and if you like the aniseed flavour that the fennel seed brings then try them out.

I shall make the stem ginger ones again and sandwich them together with a light, slightly spiced, cream cheese frosting. 
I shall also try out maple syrup with cinnamon as the spice.


I used a decent camera for most of these photo's and tried to actually set up a shot for them too. I feel the last one in the greenhouse sets a story up of someone taking a break from potting plants and having a read of some well thumbed books with a cup of tea and biscuit.