I have moved to a blog that merges this and my other blog.
http://suburban-kitchen-allotment.blogspot.co.uk/
Friday, 20 April 2012

Sunday, 22 January 2012
Icing, frosting and decorating.
I'm not sure why we say icing and in America it is known as frosting but I suppose they both herald back to comparing the look of this sweet cake topping being like ice or frost. I like to use both, frosting seems to fit cupcakes better than icing; icing tends to conjure up images of cupcakes dipped in water icing and royal icing making stiff peaks for that classic snow scene christmas cake decoration. On that note I have decorated my Christmas cake. I know it's almost a whole month late but the great thing about fruit cake is how it lasts for a long time, especially if it's been fed with brandy; which acts to preserve it.
Icing
Here's how to ice and marzipan a fruit cake.


Icing
Here's how to ice and marzipan a fruit cake.

Turn the cake so it is resting on its top. The base of the cake makes a great flat surface for icing on.

Roll out two thirds of the marzipan into a long strip that is about half a cm thick. Use icing sugar to stop it from sticking to the rolling pin.

Cover the cake with apricot glaze/jam which serves to glue the marzipan to the cake. By the way I just use shop bought marzipan though you could make your own if you wanted to.

Roll the cake along the marzipan and seal it at the join.

Trim off the excess to allow for the top to be rolled out and put on.

This is the completed marzipanned cake.
I make my royal icing by mixing 2 egg whites and then sifting in icing sugar until the icing is the required consistency. It needs to be thick, but not too thick that you can't spread it. At that point add about a tablespoon of glucose syrup, this magic ingredient stops the icing becoming like rock and braking your teeth when you eat it.

Egg whites.

Sifted icing sugar.
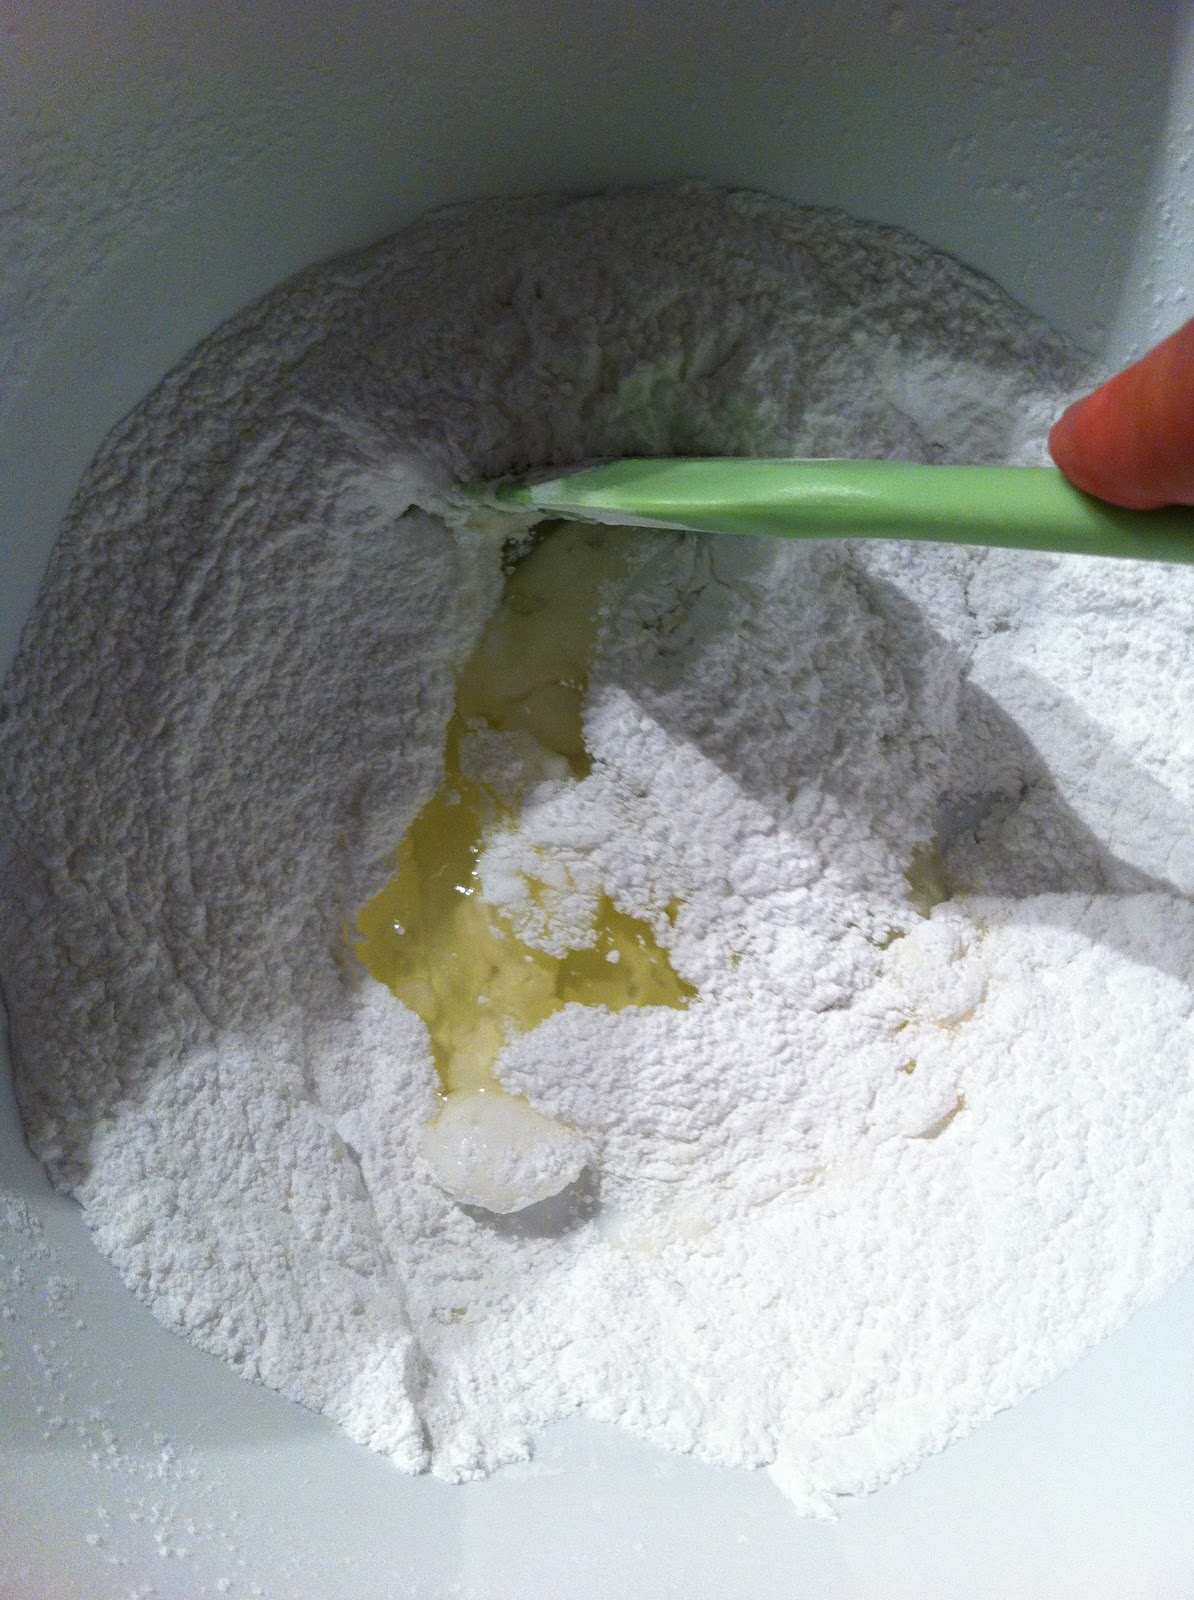
Mix mix mix

Add the glucose syrup.

Spread it over the cake and with the back of a spoon make it spiky. Adorn with your favourite christmas cake ornament and enjoy your belated christmas cake!
Frosting
Having made some very tasty cupcakes and muffins in the past the perfectly iced/frosted cupcake has alluded me. I have explored piping and spreading frosting on and my attempts have failed to impress.

These red velvet cupcakes did taste very good, but they looked like a child had decorated them. So with that in mind my friend and I enrolled on a 2 hour piping course held by the Cookie Girl. We managed to get a very cheap deal for the course and were excited when the day eventually came around.

On offer were a variety of frosting colours, piping nozzles and also decorating bits and bobs. First we were shown how to fit the nozzle and fill the bag, a disposable plastic piping bag, not the most eco-friendly way to do this I know, but a much easier way.

We were shown a variety of piping techniques, the rose, iced gem, shell amongst others.

The iced gem style. Do blobs with a classic 'mr whippy' piping nozzle and space them apart from each other then fill in the gaps on your second go around.

The classic swirl. Start on the outside of the cake, overlapping the casing a little and swirl around to the middle.

The shell, do two half moon swirls, that look like a letter C and then finish with an iced gem in the space left over. I added the silver balls to cover up a mistake I had made but the effect was really good in the end.

This is one of my friends cakes, demonstrating a good two tone swirl.

This is the rose, you start in the middle and swirl the frosting to the outer edge, trying to keep the level of it the same as you go.

We had a great time (though I wasn't too keen on the apron) and got to take home 8 cakes in total. 4 practice ones and 4 decent ones. Thanks to Siobhan for organising!

Next time, sourdough bread.
Sunday, 1 January 2012
Happy New Year
And a very merry festive season to you all, it's been a while since I last posted and I have only one thing to blame for that, Oliver! I was playing the part of Mr Sowerberry in a local production of Oliver! and it pretty much took over all my free time in November and December so that is why I've been absent. Anyway I'm back now and with a whole slew of photo's and two recipes to share. Less of the alchemaic this round though as I've been following tried and tested recipes for the Christmas.
Great Grandad Bellamy's Christmas Cake.
Every year around the start of November I make this cake from a recipe that has been used in my family for years. It's a rich fruit cake which is fed with brandy for about a month, then covered in marzipan and royal icing (I don't use the plastic that is ready roll icing).
Ingredients
Method
Line an 8" round loose bottomed cake tin with double thickness of greaseproof paper.
To do this roll the tin along the paper to measure its circumference and the take out the bottom and draw around it to get a piece to line the base. You want two pieces of paper for the sides and bottom.


Beat the butter until creamy add the granulated and brown sugar and continue to beat until light and fluffy, about 3 minutes. Add the egg yolks and vanilla and beat again. Then add the chocolate and mix well finally add all of the flour. Beat until the dough comes together and then remove it from the bowl, wrap it in cling film and pop it into the fridge for at least 30 minutes.


Great Grandad Bellamy's Christmas Cake.
Every year around the start of November I make this cake from a recipe that has been used in my family for years. It's a rich fruit cake which is fed with brandy for about a month, then covered in marzipan and royal icing (I don't use the plastic that is ready roll icing).
Ingredients
- 1/2lb of unsalted butter
- 1/2lb of soft brown sugar
- 4 eggs
- 10oz plain flour (all-purpose)
- 1/2 tsp mixed spice
- 1/2 tsp baking powder
- 1/2 tsp nutmeg
- 2oz dried cherries (or glace, but wash them first so the syrup isn't in them so much as this causes them to sink)
- 1/4lb currants
- 1/2 sultanas
- 1/4lb chopped candied peel
- 1/2lb raisins
- 1/4lb chopped almonds
Method
Line an 8" round loose bottomed cake tin with double thickness of greaseproof paper.
To do this roll the tin along the paper to measure its circumference and the take out the bottom and draw around it to get a piece to line the base. You want two pieces of paper for the sides and bottom.

Cut some slits along the bottom which will help it fit into the tin like below.

Pop the disc for the base on top then repeat with the second side layer and second base layer.

Make sure it extends over the top of the tin.

When the tin is prepared set it to one side ready for the cake batter.
Beat the butter and sugar to a soft cream and then add the eggs one at a time beating well after each one.

It really does help to have a free standing mixer especially when cream butter and sugar together.


Add half of the fruit next, followed by half the dry ingredients (that have been sifted together), then the remaining fruit and finally the remaining dried ingredients. Spoon the batter into the tin and smooth off the top with the back of a spoon.
Bake in the over at 300F for one hour and then turn down to 275F for 2 to 2.5 hours, if the top looks like it's browning cover it with some baking parchment.
When its cooked, let it cool in the tin and the the next day turn the cake upside down and prick the bottom several times. Spoon over 4 tablespoons of brandy and store upside down in the tin until ready to ice.
When I have decorated my cake I'll upload a photo of it.
Chocolate Mint Thumbprints
This recipe comes from the book 'Baked Explorations: Classic American Deserts Reinvented'.
Ingredients
For the thumbprints
2oz of plain chocolate, about 60-72% cocoa solids.
2oz of mint chocolate
1.5 cups of plain flour
1/2 cup of unsweetened cocoa powder
3/4 tsp salt
1 cup (2 sticks) unsalted butter cut into cubes and at room temp.
2 tbsp of dark brown sugar (muscavado)
1/3 cup granulated sugar
2 large egg yolks
vanilla essence
coarse sugar for rolling
For the white chocolate filling
3oz white chocolate
2 tbsp heavy cream (double cream in the UK)
1/2 tsp peppermint extract
Method
Melt the dark chocolate and mint chocolate either in the microwave or a double boiler, stir until smooth and combined and set to one side. Sift all the dry ingredients together a separate bowl.


Beat the butter until creamy add the granulated and brown sugar and continue to beat until light and fluffy, about 3 minutes. Add the egg yolks and vanilla and beat again. Then add the chocolate and mix well finally add all of the flour. Beat until the dough comes together and then remove it from the bowl, wrap it in cling film and pop it into the fridge for at least 30 minutes.

Preheat the oven to 180C, line two baking sheets, put the coarse sugar into a bowl and break off tablespoons of the dough, roll them in the sugar and put them onto the sheet. Press the slightly and then using the end of a wooden spoon make a dent in the middle of them.
Bake for 10 minutes and then take out of the oven, re-dent them and pop them back into the oven for a remaining 5 minutes. Remove them from the oven if they start to crack.
Cool the completely before filling them.

For the filling, put the cream into a microwave proof bowl (a jug would be best), and heat on full power for about 30 seconds. Remove and stir in the chocolate until it is melted. Add the peppermint extract and stir until all is combined.

spoon this or pour it, into the indents of each biscuit and then cool them in the fridge until set.

Simple and delicious, in the words of Ina Garten, 'how easy is that?'
Sunday, 27 November 2011
Vegetables in baking
Vegetables are undergoing a bit of a fashion revival at the moment I feel, teaching 5 year olds I was amazed when we did our topic on healthy eating and they came up with a whole multitude of veg that they enjoy. Exposure to more unusual veg through farmers markets and organic box schemes like Riverford and Abel and Cole have helped this somewhat. Even my personal food hero Hugh Fearnley-Whittingstall is championing the eating of more vegetables in our meals.


In fact watching River Cottage Veg Everyday has got me to thinking about how I can use more veg in my baking. I tend to bake only sweet things so it is really is an area of alchemy ripe to explore.
I'm tempted to try this recipe avocado chocolate tart, it seems really easy and looks delicious. I can totally see how avocado would make a smooth and creamy chocolate ganache. No cooking involved either and no dairy or gluten too! Apart from the walnuts in the base it's quite a good dish for intolerances. I may suggest making it instead of the chocolate truffle torte I usually make at Christmas.
I have a feeling my upcoming allotment will feature heavily in an increase of eating vegetables in my diet after xmas. I can feel a second blog coming on too perhaps...
Recipe
Courgette cake
recipe from hummingbird bakery cake days
This couldn't be simpler, in fact there's not even any butter in it so there's no fussy creaming to do.
In the bowl of an electric mixer, with the paddle attachment (or in a bowl with an electric hand whisk) mix together 3 large eggs, 300ml of sunflower oil, 1/2 tsp of vanilla essence and 300g of soft brown sugar. Beat until well combined. In another bowl, sift together 300g of plain (allpurpose) flour, 1tsp bicarb, 1tsp baking powder, 2tsp ground cinnamon, 1/2 tsp ground ginger, 1/2 tsp of ground nutmeg. Add this to the oil and egg mix slowly and in two batches. Then when it's all mixed in, add 300g of courgettes peeld and grated and 100g walnuts chopped.
Divide the mix evenly between three 7inch sandwich tins that have been lined with baking parchment. Bake in an oven at 180C for 30 -35 minutes or until the cakes have slightly come away from the sides of the tin and when you touch it lightly it springs back.
Remove from the oven and allow to cool in the tines slightly (this makes the cakes easier to remove) then cool completely on a wire wrack.
Assemble your cake using a good cream cheese frosting, putting a couple of table spoons between each layer


Then frost the sides and the top, smoothing out with a palette knife.


A dusting of cinnamon at the end is optional, as was the purple edible glitter that my flatmate added afterwards. This was for a birthday cake for my flatmate's mum and it went down a real treat, considering that the idea wasn't one that was intially taken wholeheartedly.
I do recommend you try it out!
What vegetables have you used in sweet baking and how did you use them?
That's all from me for today, a shorter post I know but next time will be more xmas baking!
Wednesday, 16 November 2011
Christmas is a coming!
Well I can, honestly and thankfully say my journey with the GBBO is over. I had a phone call yesterday with "not good news" and they gave some scripted feedback of " the quality of candidates was very high, yadda yadda yadda, range of repertoire blah blah blah" to be honest I wasn't listening, I was just letting it sink in a bit. Not only did I get so far last time, to being a standby, they then badgered me to apply this time, raising in me that false sense of hope. At least I know I'll have some sort of normal life for the remainder of this academic year, and I'm a true believer in things happening for a reason. It wasn't meant to be and in the spirit of my good, and very supportive friends, onwards and upwards.
The best things to come out of all of this are my blog and my expanded repertoire of baking. I'm not scared of trying something new, knowing that actually nothing is impossible if you truly believe it! Also I'm not going to forget the praise Mary Berry and Paul Hollywood had for my baking when I met them earlier this year; great pastry and wonderful meringues!
Recipes
Two recipes today, which I made as a stuff you to the GBBO last night in a bid to move onwards and upwards. I can't claim they are my own creations, but they are very tasty and well worth sharing with you.
Jamies mince pie cookies
250g unsalted butter at room temperature and soft
140g caster sugar
1 large egg yolk
300g of plain flour
1 jar of mincemeat (411g)
Making these made me realise that a cookie recipe is basically a cake recipe minus the raising agent and so much egg. Cream the butter until it's light a fluffy with the caster sugar, it really does take about 3-4 minutes in the Kenwood electric mixer, and the change is quite amazing. I always used to cream butter until I was bored (back in the days of using a wooden spoon) but now I have the Kenwood, I know it is much more. The butter does get paler, and the volume increases until it's like stiff cream!
Mix in the egg yolk and sift in the flour. This should make a thick paste which you can fold in about 3/4 of the the mincemeat. Take a tea spoon (the regular kind not the measuring kind) of the cookie dough and plop it on to a lined baking sheet. Add a smidgen o the reserved mincemeat onto the top of each cookie ball before baking in an oven that has been preheated to 180C for about 10 minutes or until golden brown. Dust with caster sugar and let cool on in the tin for about 5 minutes before transferring to a wire wrack.
These would be amazing sandwiched with a boozy, brandy buttercream!


The best things to come out of all of this are my blog and my expanded repertoire of baking. I'm not scared of trying something new, knowing that actually nothing is impossible if you truly believe it! Also I'm not going to forget the praise Mary Berry and Paul Hollywood had for my baking when I met them earlier this year; great pastry and wonderful meringues!
Recipes
Two recipes today, which I made as a stuff you to the GBBO last night in a bid to move onwards and upwards. I can't claim they are my own creations, but they are very tasty and well worth sharing with you.
Jamies mince pie cookies
250g unsalted butter at room temperature and soft
140g caster sugar
1 large egg yolk
300g of plain flour
1 jar of mincemeat (411g)
Making these made me realise that a cookie recipe is basically a cake recipe minus the raising agent and so much egg. Cream the butter until it's light a fluffy with the caster sugar, it really does take about 3-4 minutes in the Kenwood electric mixer, and the change is quite amazing. I always used to cream butter until I was bored (back in the days of using a wooden spoon) but now I have the Kenwood, I know it is much more. The butter does get paler, and the volume increases until it's like stiff cream!
Mix in the egg yolk and sift in the flour. This should make a thick paste which you can fold in about 3/4 of the the mincemeat. Take a tea spoon (the regular kind not the measuring kind) of the cookie dough and plop it on to a lined baking sheet. Add a smidgen o the reserved mincemeat onto the top of each cookie ball before baking in an oven that has been preheated to 180C for about 10 minutes or until golden brown. Dust with caster sugar and let cool on in the tin for about 5 minutes before transferring to a wire wrack.
These would be amazing sandwiched with a boozy, brandy buttercream!


They went down a treat at rehearsals and the mincemeat flavour really came through!
Nigella's Almond Macaroons
If you like coconut macaroons and marzipan then these are the treat for you, and amazingly easy to make. The recipe is one that I have already committed to memory too it's so simple!
200g ground almonds
200g caster sugar
2 large egg whites.
Basically mix all of the above into a dough and when it comes together break off bits about the size of a walnut and roll them into a ball. Put them onto a lined baking sheet and stud the top of them with a blanched whole almond. Press them down slightly and bake them at 180C for 10 minutes until they just start to take colour.


They were slightly chewy and very delicious! I can see pistachio, hazelnut and other ground nut varieties of this recipe!
Mary Berry's Christmas Cake

Yes, I know, can you believe it? This year has seen a surge in supermarkets doing their own version of a Christmas Cake kit. Tesco have Mary Berry, Waitrose have Delia Smith and Sainsbury's have their taste the difference version. I think it's great to get people to challenge themselves with their baking, Chrimbo cakes are quite a commitment to get right!
I wish I had the time to try them all out and review them (I'm not sure I could stomach that much fruit cake though!). I'll stick with the family recipe for the time being.
Sunday, 13 November 2011
Cinnamon Buns!
I have applied to the third series of the British Bake Off but having signed a form to say I can't discuss it I won't be mentioning it on here, however I will say this, I'm going to do my damnedest to get on to it this time (after last time being so close!).
In other baking news, I've practised my hot water crust pastry, which I can only compare to a warm clay when it comes to working with it. I followed Paul Hollywood's recipe for it from here and used beef dripping instead of lard (which is apparently a pork fat I thought it was generic animal fat). I tried to roll out the pastry but it proved too tricky to manage; it decided to stick to the work top and refuse to be peeled off so I had to research other techniques to make the pie crust, and this is where my analogy to clay comes from.
Delia recommends taking two thirds of the dough for the pie crusts and reserving the remaining third for the lids, then to use your fingers to shape the crusts. This method worked really well.
I took the 2/3, divided them into 6 equal balls (I didn't weigh them to ensure absolute equality, that is going a bit overboard I reckon), and popped each ball into a muffin pan hole.
My usual muffin pan was set to one side in favour of this funky new contraption I found in Lakeland here. I heartily recommend it for dishes such as this, the greatness of it is that it has straight sides and loose bottoms! This made it from perfect pork pies, or in my case layered vegetable pies.
Using my fingers I pulled and shaped the dough to fit the tin, pushing it into the corners to give a crisp 90 degrees. I made sure to pull the dough up over the top of the case to help form a decorative seal when the lids were put on. My fillings were various layers of roasted vegetables, that I had cooked before hand so they had shrunk already, and then I took 1/6 of the reserved dough and flattened it between the palm of my hands to make a disc for the lids; sealed it up and brushed with egg wash. I used a knife to make a hole in top which would let the steam out and also allow me to pour in a jelly made with vegetable stock.
These photo's show you how they turned out! The layers were, courgette, aubergine, roasted red pepper, onions, mushrooms and a sun dried tomato at the top. They were fantastic and I recommend you have a go at making them.


In other baking news, I've practised my hot water crust pastry, which I can only compare to a warm clay when it comes to working with it. I followed Paul Hollywood's recipe for it from here and used beef dripping instead of lard (which is apparently a pork fat I thought it was generic animal fat). I tried to roll out the pastry but it proved too tricky to manage; it decided to stick to the work top and refuse to be peeled off so I had to research other techniques to make the pie crust, and this is where my analogy to clay comes from.
Delia recommends taking two thirds of the dough for the pie crusts and reserving the remaining third for the lids, then to use your fingers to shape the crusts. This method worked really well.
I took the 2/3, divided them into 6 equal balls (I didn't weigh them to ensure absolute equality, that is going a bit overboard I reckon), and popped each ball into a muffin pan hole.
My usual muffin pan was set to one side in favour of this funky new contraption I found in Lakeland here. I heartily recommend it for dishes such as this, the greatness of it is that it has straight sides and loose bottoms! This made it from perfect pork pies, or in my case layered vegetable pies.
Using my fingers I pulled and shaped the dough to fit the tin, pushing it into the corners to give a crisp 90 degrees. I made sure to pull the dough up over the top of the case to help form a decorative seal when the lids were put on. My fillings were various layers of roasted vegetables, that I had cooked before hand so they had shrunk already, and then I took 1/6 of the reserved dough and flattened it between the palm of my hands to make a disc for the lids; sealed it up and brushed with egg wash. I used a knife to make a hole in top which would let the steam out and also allow me to pour in a jelly made with vegetable stock.
These photo's show you how they turned out! The layers were, courgette, aubergine, roasted red pepper, onions, mushrooms and a sun dried tomato at the top. They were fantastic and I recommend you have a go at making them.


The one below is an example of where it didn't work, the vegetables were raw when I put them in and as they cooked they shrank. This left a massive hole at the top of the pies filled with nothing. Cooking the veg before hand helped solve this.

Alchemy
This weeks alchemy is based on that traditional recipe of a cinnamon bun. Instead of a the plain cinnamon and muscavado sugar filling, I decided to up the ante and change it to sour cherries, pecans, cocoa powder, cinnamon, ginger and muscavado sugar. This produced a rich, gooey, treacly filling which went down a storm. That was lucky too as I didn't actually try it before I unleashed it upon the unsuspecting!

Glazed with an apricot jam glaze, they were very very delicious.
Recipe:
For the dough
275ml of luke warm water
5g of dry active yeast (not that instant yeast you get in sachets, this is the yeast you may find in a little tin).
4 tbsp of granulated sugar
600g strong bread flour (white works best, wholemeal is nice, but the buns are very heavy)
1/4 tsp salt
175ml warm milk
75g of room temp, soft butter
To make this dough weigh the water and the yeast in a jug (1ml of water weighs 1g which is handy!), hitting the zero button between each addition. Put one of the 4 tbsp of sugar in to the lukewarm water (stir to dissolve it), along with the yeast and set it to one side to allow the yeast to activate and start frothing away. In a large bowl, stir the flour, remaining 3 tbsp of sugar, salt and also the butter (which should quickly rub in due to its soft nature).
When the yeast has frothed up and proven it's alive, pour this into the flour mix. using your fingers mix it all up and add enough of the milk to just make sure you get all the rest of the dry ingredients. You may not need all of the milk.
Turn the dough out on to a floured work top and start kneading. Knead for about 10 minutes by pushing away from you with the heel of your hand and pulling it back towards you with you fingers. What you are doing when kneading is activating the gluten. Gluten is a lovely molecule, key to baking. In bread you want it to form long elastic strands which give an airy texture to trap the CO2 made by the yeast as it feasts on the sugar; this is the opposite of pastry where you want to minimise the gluten activation!
The way I tell if the dough is ready is by gathering the dough into a ball using the outer edges of my hands turned inwards. I scoop and turn from the bottom of the dough which pulls the top down taught like a drum skin. Then I press the top with my finger and if it springs back quickly you know it's about ready.
After this, place the dough ball into a lightly oiled bowl and turn it so as to cover all the dough with a light sheen of oil (flavourless oil for this sweet dish). Leave it somewhere to double in size, the temperature will affect the speed this happens at.
Preheat the oven to 200C and line a deep baking dish with paper. Take your risen dough and knock it back by punching it! Then stretch your dough out with your hands into a large rectangle (I'm not sure how big really, but maybe 30cm long and 20 cm wide). Then melt some butter and brush on to the dough (this helps the sugar mix adhere).
in another bowl mix up sugar, sour cherries, pecans, cinnamon, ginger, cocoa and a little salt to taste. Sprinkle this over the buttered dough and then roll it up and if you run out make up some more. Roll up from the longest edge closest to you, keeping it tight and trimming off the edges if they flay all over the place. Once rolled tightly, cut it into about 12 thick slices and place them close together int the tin. Use the off cuts to fill in gaps if needed; they also work well as tester balls to see if the buns are cooked.
Bake until cooked and brown then take out of the oven and serve asap.
Tuesday, 1 November 2011
A long overdue update
Hello dear readers, I'm back now that my laptop is fixed and I have a whole host of updates to share with you. I've kept up with my baking, especially since the Great British Bake Off series 2 has finished and I'm trying for the 3rd series now. I have decided that I need to practise making puff pastry, choux buns and croissant dough.
Baking
My most recent bakes include two dishes that I took to a halloween party at the weekend. I made a Red Velvet Cheesecake from the Outside Tart baking book,




Pound Cake
100g butter
100g sugar
2 eggs
100g plain flour
1/2tsp baking powder
One thing that I added, for flavour was some vanilla extract too. The interesting thing about the recipe was the meticulous detail that the writer went to with every step. Even showing how they smooshed the egg through a fine sieve to remove the lumps.


Baking
My most recent bakes include two dishes that I took to a halloween party at the weekend. I made a Red Velvet Cheesecake from the Outside Tart baking book,

Sadly the middle wasn't cooked as much as the edges and this was due to it being too full when I put it into the oven. The recipe made SO much filling for a 9inch pan (the recommended pan size). It tasted amazing though and to be honest, for a halloween party it was great; I called it a blood cheesecake.
I also made come carrot cake whoopie pies, from Outsider Tart, but I didn't put frosting on them and served them as carrot cake cookies really.

Recipe
When I was in London town recently I went to Mitsukoshi, which is a Japanese department store. In its basement is a Japanese book shop and I decided to buy a Japanese baking book. he great thing about Japanese cook books is that they use photo's for step by step instructions. Using my rudimentary Japanese reading skills I was able to pretty much get the recipe for a basic vanilla pound cake.
Here's the book,

The first set of photos showed me how to perfectly line a baking tin.

First take some greaseproof that wraps up both sides and along the base.

Fold it up the sides and crease.

Fold it up the ends and crease too.

You should have basically a grid like this and then you can cut it as shown below.


Fold the sides up and the end so there are three flaps overlapping at the ends. Then slot it into the tin and bingo you have a perfectly lined loaf tin!

100g butter
100g sugar
2 eggs
100g plain flour
1/2tsp baking powder
One thing that I added, for flavour was some vanilla extract too. The interesting thing about the recipe was the meticulous detail that the writer went to with every step. Even showing how they smooshed the egg through a fine sieve to remove the lumps.


It does make for a smoother egg which mixes easier into the batter.
Method.
Sieve the flour and baking powder onto a piece of greaseproof paper. Whisk the butter until smooth and pale, about 2 minutes with an electric hand whisk. Then add the sugar and beat for a further 2 minutes. Scrape down the sides with a rubber spatula to ensure it all is incorporated. Next add the egg 1tbsp at a time, use a balloon whisk to mix it 20 times after each tbsp of egg. Mix in the flour and baking powder using a wooden spoon, being careful to mix all of the flour in thoroughly, though not over mixing (the book recommends 30 stirs).
Spoon the mixture into the prepared tin and bash it against the work top to level the mixture out. Pop it into the oven which is set at 180C. After just 10 minutes open the oven door and using a very sharp nice cut along the length of the cake then put it back into the oven to continue cooking for a further 20 minutes or until a tooth pick inserted into the middle comes out clean. What the cutting does is allow the cake to rise up through the middle, giving it that traditional pound cake look.

Now I'm not a fan of basic sponge cake, but this was a great recipe and made a delicious vanilla pound cake!
Alchemaic Baking
This book goes on to suggest different things to do with the cake. Being Japanese it suggests mixing green tea powder into it, anko bean paste and cocoa powder. There are some other interesting combinations too though, like slicing a pear on to the top of it, making a marble cake with half of the batter being one flavour and the other half being vanilla.
Once you have a basic batter, you can really add anything to it! hmm ginger might be nice, with a gingery glaze on top too....
Subscribe to:
Posts (Atom)